Introduction: Your Cybersecurity Career Starts in Your Bedroom
Most people think breaking into cybersecurity requires a fancy degree, expensive certifications, or some kind of insider access. The truth? Some of the most skilled ethical hackers and security analysts working in top firms today got their start on a beat-up laptop, running free tools, in their living room at midnight.
That’s the power of a cybersecurity home lab, it democratizes one of the fastest-growing and highest-paid fields in tech. You don’t need a server rack, a corporate budget, or even a blazing-fast machine. What you do need is a clear roadmap, the right free tools, and the willingness to break things (virtually, of course) until you understand how they work. According to the Identity Theft Resource Center’s 2025 Annual Data Breach Report, the United States alone recorded 3,332 data compromises in 2025, a new all-time record. Companies are now desperate for people who can actually defend against these threats, and a home lab is where that journey begins.
In this guide, we’re walking you through everything, from the very first download to setting up advanced attack-and-defense simulations. Whether you’re a complete beginner who has never touched Kali Linux, or an intermediate learner who wants to level up their home lab setup, this is your complete, step-by-step blueprint for 2026. Let’s get into it.
What Is a Cybersecurity Home Lab and Why Does It Matter in 2026?
A cybersecurity home lab is essentially a private, controlled testing environment where you can legally practice hacking, penetration testing, malware analysis, network defense, and everything in between without touching real-world systems or breaking any laws.
Think of it like a flight simulator for pilots. No pilot is handed the controls of a real commercial aircraft on day one. They spend hundreds of hours in a simulator, making mistakes, learning procedures, and building muscle memory in a consequence-free environment. Your cybersecurity home lab works the same way. As Apporto’s 2026 home lab guide describes it, reading about cybersecurity is useful, but the real learning happens when systems behave in unexpected ways – logs fill with strange entries, a network scan reveals something that shouldn’t exist, and those moments of confusion are exactly where understanding starts to deepen.
Instead of experimenting on your main computer or personal network, everything happens inside an isolated setup designed specifically for learning. You can launch attacks, trigger malware behaviors, configure firewalls, and simulate entire corporate network environments, all from a single machine sitting on your desk.
Why does this matter now more than ever? Check Point Research found that organizations faced an average of 2,003 cyberattacks per week in 2025, showing just how aggressively threats are escalating. Companies are desperate for skilled professionals who can demonstrate real, hands-on ability, not just theoretical knowledge from a textbook. Hiring managers increasingly look for candidates who have built their own labs, documented their findings, and can walk through an attack chain from start to finish.
The best part and this is what most people don’t realize is that building a cybersecurity home lab in 2026 costs nothing beyond the hardware you likely already own. VirtualBox is free, Vmware is free, Kali Linux is free, and vulnerable VMs like Metasploitable are free. Docker is free. AWS offers a 12-month free tier. The barrier has never been lower.
Step 1: Define Your Cybersecurity Home Lab Learning Goals First
Before you download a single tool, you need to answer one question: What do you actually want to learn?
This sounds obvious, but it’s the step most beginners skip and it’s the reason so many people build elaborate labs they never meaningfully use. As penetration testing experts at SafeAeon recommend, you should pick specific topics you want to master like ethical hacking, network security, or malware research, and then set SMART goals: specific, measurable, achievable, relevant, and time-bound. These keep your lab growth on track and stop you from getting lost in an endless ocean of tools.
Here are some common learning tracks to help you decide:
- Offensive Security/Penetration Testing – You want to learn how attackers think. You’ll focus on tools like Metasploit, Nmap, and Burp Suite, and practice exploiting vulnerabilities in intentionally vulnerable VMs.
- Defensive Security/Blue Team – You want to detect, respond to, and contain attacks. You’ll set up SIEM tools, firewalls, intrusion detection systems, and log analysis platforms.
- Web Application Security – You want to understand SQL injection, XSS, broken authentication, and OWASP Top 10 vulnerabilities using platforms like DVWA and Juice Shop.
- Network Security – You want to understand how traffic flows, how to capture and analyze packets with Wireshark, and how to configure VLANs and firewall rules.
- Malware Analysis/Forensics – You want to reverse-engineer malicious code and understand how attackers operate after an initial compromise.
You don’t have to pick just one track, but starting with a focused goal keeps your lab from becoming a cluttered mess of tools you’ve never actually used. For most beginners, offensive security paired with basic network defense is the most rewarding combination. You learn to attack first, which makes defense far more intuitive later.
Step 2: Cybersecurity Home Lab Hardware Requirements (Free to $500)
Here’s the part that surprises most newcomers: your current computer is probably good enough to start a functional cybersecurity home lab. According to Apporto’s detailed setup guide, for most home labs, a modern processor such as an Intel i5 or i7, or an AMD Ryzen equivalent works well. Memory matters even more than the CPU: 16GB of RAM is the practical minimum, while 32GB gives a noticeably smoother experience when several virtual machines run simultaneously. A fast SSD with at least 512GB helps VMs load quickly and keeps the overall lab responsive.
Here’s a practical budget breakdown for building your cybersecurity home lab in 2026, aligned with the cost tiers outlined by Nucamp’s 2026 beginner home lab guide:
| Budget Tier | Hardware | What You Can Run |
|---|---|---|
| $0 – Use what you have | Existing laptop/desktop, 8 – 16GB RAM, 256GB SSD | 1 – 2 VMs (Kali + one target) |
| Under $150 | Add a 16GB RAM stick or external SSD | 2 – 3 VMs comfortably |
| $150 – $300 | Used mini PC (e.g., refurbished Dell OptiPlex) with 32GB RAM | Full beginner lab with 3 – 4 VMs |
| $300 – $500 | Dedicated mini PC, 32 – 64GB RAM, 1TB NVMe SSD | Advanced lab: SIEM, firewall, multiple attack/target VMs |
| $500+ | Used enterprise server (e.g., Dell PowerEdge) | Full enterprise simulation, always-on lab |
The golden rule: start with what you have. Many practitioners have passed their OSCP certifications on nothing more than a consumer laptop with 16GB of RAM. You can always scale up hardware as your skills and ambitions grow. Money is rarely what separates beginners from experts in this field but habits and consistency are.
One important pre-flight check: Before installing any virtualization software, go into your BIOS/UEFI settings and confirm that Intel VT-x or AMD-V (hardware virtualization) is enabled. Without it, you won’t be able to run 64-bit virtual machines, which covers almost everything you’ll work with in your cybersecurity home lab.
Step 3: Choose Your Hypervisor – The Core of Your Cybersecurity Home Lab
A hypervisor is the software that allows your single physical machine to run multiple virtual machines at the same time. Think of it as a landlord renting out separate, self-contained apartments inside one building. For a security lab where you need both an attacker machine and a target running simultaneously, VirtualBox is a good free option. VMware Workstation is another great option, thought it used to limit to one VM at a time on the free tier which means you can’t simultaneously run Kali and a target without paying for the Pro version but as of 2026, it is totally free to run as many VM as you want.
A quick comparison of the top hypervisors for your 2026 cybersecurity home lab:
| Hypervisor | Cost | Best For | OS Support | Beginner-Friendly? |
|---|---|---|---|---|
| Oracle VirtualBox | Free | Beginners, all-in-one labs | Windows, macOS, Linux | Yes |
| VMware Workstation Player | Free | Windows/Linux users | Windows, Linux | Yes |
| VMware Workstation Pro | Paid | Advanced users, nested VMs | Windows, Linux | Moderate |
| Proxmox VE | Free | Dedicated server/always-on lab | Linux bare metal | Advanced only |
| UTM | Free | macOS M1/M2/M3 users | macOS only | Yes |
Our recommendation: Start with VirtualBox. It’s free, cross-platform, and has one of the largest troubleshooting communities of any virtualization tool on the internet. It handles everything you’ll need from beginner to intermediate stages without costing a dollar.
Step 4: Set Up Your Attacker Machine – Kali Linux for Your Cybersecurity Home Lab
Once VirtualBox is installed, your first real task is getting Kali Linux running. Kali is the undisputed standard for penetration testing operating systems in 2026. As documented by Red Secure Tech’s ethical hacking lab guide, Kali continues to dominate as the go-to pentesting OS, with new tools added regularly to support AI-assisted attacks and cloud-based reconnaissance making it the most current and practical choice for your home lab attacker machine.
It comes preloaded with hundreds of security tools right out of the box, including:
- Nmap – for network discovery and port scanning.
- Metasploit Framework – for finding and exploiting known vulnerabilities.
- Burp Suite Community Edition – for intercepting and testing web application traffic.
- Wireshark – for capturing and analyzing network packets in real time.
- Sqlmap – for automated SQL injection testing against databases.
Setting up Kali Linux on VirtualBox – step by step:
- Visit kali.org/get-kali and download the pre-built VirtualBox image (the .ova file – no manual OS installation required, which saves a lot of beginner headaches).
- In VirtualBox, go to File > Import Appliance and select the downloaded .ova file.
- Allocate at least 4GB RAM and 2 CPU cores to the VM. If your hardware allows, 6GB RAM and 4 cores gives a noticeably smoother experience.
- Boot the VM. Default credentials are kali /kali. Change your password immediately, this is not optional.
- Before doing anything else, update all pre-installed tools with the code:
sudo apt update && sudo apt full-upgrade -y
As MyCyberSecurityPath’s home lab guide recommends, take a snapshot right after your first successful update and name it something like clean-base. This gives you a restore point if anything breaks during lab exercises because things will break, especially early on. That’s completely expected, and rebuilding is part of the learning.
Step 5: Add Your Target Machines – Vulnerable VMs for Your Cybersecurity Home Lab
An attacker machine without a target is like a boxing gym with no punching bags. You need intentionally vulnerable virtual machines – these are legal, purpose-built systems designed to be compromised for educational practice.
Metasploitable 2, created by the OffSec team and freely available on SourceForge, is the classic starting point. As StationX’s 2026 virtual hacking lab guide explains, it contains a wide range of vulnerabilities including misconfigured services, SQL injection, XSS, and command injection, giving beginners a realistic and consequence-free target to practice real exploit techniques against from day one.
Here are the best free target VMs for your cybersecurity home lab:
- Metasploitable 2 & 3 – Classic, packed with misconfigurations and vulnerabilities. The go-to starting point for practicing Metasploit exploits, FTP backdoors, and Samba attacks.
- DVWA (Damn Vulnerable Web Application) – The most widely used web vulnerability practice platform. Covers SQLi, XSS, CSRF, file upload exploitation, and command injection, all with adjustable difficulty settings.
- OWASP Juice Shop – A modern, intentionally insecure web app that mirrors real-world vulnerabilities and maps directly to the OWASP Top 10. More realistic than DVWA for web testing.
- VulnHub – Hosts over 500 community-created vulnerable VMs ranging from beginner to expert difficulty, with new machines added regularly.
- Windows Server with Active Directory – As you advance, a domain controller setup lets you practice enterprise-level attacks like Kerberoasting, Pass-the-Hash, and privilege escalation mapping with BloodHound.
Your recommended starter lab topology:
Your Physical Machine (Host)
    └── VirtualBox Host-Only Network (192.168.56.0/24)
          ├── Kali Linux (Attacker)       → 192.168.56.101
          ├── Metasploitable 2 (Target 1) → 192.168.56.102
          └── DVWA (Web Target)           → 192.168.56.103
Step 6: Network Isolation – The Most Critical Step in Your Cybersecurity Home Lab
This is the step most beginners either rush through or misconfigure and it’s arguably the most important one in the entire cybersecurity home lab setup. Your vulnerable lab VMs must never be reachable from your real home network or the public internet. They are deliberately full of security holes, and if exposed, those holes could be exploited against real devices on your network.
In VirtualBox, set up a Host-Only network adapter by going to File → Host Network Manager, creating a new adapter (e.g., vboxnet0), and assigning each of your target VMs to this network. As Unihackers’ 2026 home lab setup guide explains, this creates an isolated subnet where your VMs can only communicate with each other and with your host machine, and they cannot reach your router, the internet, or any other device on your home network.
For your Kali Linux attacker VM specifically, configure two network adapters:
- Adapter 1: NAT – Gives Kali internet access for pulling updates and downloading new tools when needed.
- Adapter 2: Host-Only – Connects Kali to the isolated lab subnet where your vulnerable target VMs live.
After setting everything up, verify your isolation by confirming that your vulnerable VMs don’t appear in your home router’s connected devices list. If they do, something is misconfigured and needs to be corrected before any exercises begin.
This network segmentation principle is the same foundational concept that protects everyday users on shared connections, something we break down in detail in our post on the real risks of public Wi-Fi and how to protect yourself when connecting. Whether you’re isolating a vulnerable VM or protecting your laptop on an airport’s shared hotspot, the logic is the same: untrusted traffic should never reach trusted systems.
Step 7: Essential Free Tools for Your Cybersecurity Home Lab in 2026
With your VMs running and your network properly isolated, here are the core free tools that power every serious cybersecurity home lab in 2026:
Scanning & Reconnaissance:
- Nmap – The gold standard for network scanning. Pre-installed in Kali. Use it to discover hosts, open ports, and running service versions across your lab network.
- Netdiscover – Lightweight ARP-based host discovery. Perfect for quickly identifying which IPs are active before launching targeted scans.
Exploitation:
- Metasploit Framework – The most widely used exploitation framework in the world. Pre-installed in Kali Linux. Launch it from terminal with
msfconsoleand you have access to thousands of exploits, payloads, and post-exploitation modules. - Exploit-DB / SearchSploit – An offline, searchable database of public exploits built directly into Kali. No internet connection needed, which keeps your lab workflow clean and isolated.
Web Application Testing:
- Burp Suite Community Edition – The industry standard for web application security testing. Intercept, manipulate, and replay HTTP requests directly. The free version covers everything a beginner and intermediate learner needs.
- OWASP ZAP – A fully free, open-source alternative to Burp Suite with automated scanning built in. Great for DVWA and Juice Shop exercises, and actively maintained by the OWASP community.
Traffic Analysis:
- Wireshark – Capture and analyze network packets in real time with a full graphical interface. Essential for understanding what your attacks actually look like at the protocol level, a perspective that deeply changes how you think about both offense and defense.
- tcpdump – Lightweight command-line packet capture. Faster and leaner than Wireshark for quick grabs when you don’t need the GUI.
Defense & Monitoring:
- Security Onion – A free Linux distribution that bundles IDS, full-packet capture, and a SIEM interface into one ready-to-deploy VM. Set this up as a dedicated defender machine and watch your own attacks generate real-time alerts on the other side.
- Wazuh – An open-source SIEM and EDR platform used extensively in real enterprise environments. Excellent for learning log analysis, file integrity monitoring, and intrusion detection rules without spending a dollar.
Step 8: Online Platforms That Supercharge Your Cybersecurity Home Lab Learning
Your home lab is your personal sandbox, but sometimes you want guided exercises with structured progression and feedback. These free and freemium platforms complement a local cybersecurity home lab setup extremely well:
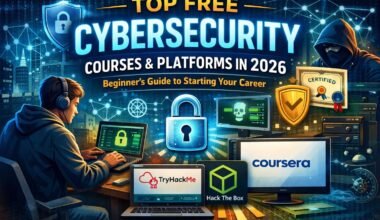
- TryHackMe – Browser-based guided learning paths organized by skill level. The free tier covers an enormous amount of ground, including beginner tracks, network fundamentals, and web hacking. As MyCyberSecurityPath recommends, work through the “Pre-Security” and “Jr Penetration Tester” paths while recreating the same exercises locally in your home lab for maximum retention and muscle memory.
- Hack The Box – More challenging, community-driven machines that closely mirror real penetration testing engagements. A free tier is available, and the platform is widely respected by employers as a credibility signal on a CV.
- VulnHub – Free downloadable vulnerable VMs you run directly inside your local home lab environment. Over 500 machines across all difficulty levels, all completely free.
- OverTheWire Wargames – Command-line based challenges that build core Linux and networking proficiency in parallel with your VM lab work. An excellent complement that costs nothing.
These platforms don’t replace your local lab, they complement it. Use guided platforms to learn the conceptual framework, then bring those exercises into your own isolated environment to build the kind of hands-on confidence that shows in interviews.
The skills you build this way are directly applicable beyond the lab too. Understanding how an attacker stages and delivers a payload, which you’ll practice repeatedly is exactly the knowledge that helps you recognize the warning signs of compromise in everyday devices. That connection is explored in our guide on how to check your Android or iPhone for spyware and banking malware.
Step 9: Advanced Cybersecurity Home Lab Configurations for 2026
Once you’re comfortable with the basics, here’s how to evolve your cybersecurity home lab from beginner to genuinely advanced:
Add an Active Directory Environment
Set up a Windows Server VM as a domain controller and join a Windows 10 or 11 endpoint to the domain. This unlocks a huge range of realistic enterprise attack practice, including Kerberoasting, AS-REP Roasting, Pass-the-Hash attacks, BloodHound privilege escalation mapping, and Group Policy misconfiguration abuse. Active Directory attacks are among the most common techniques in real-world breaches, and practicing them in a safe environment is one of the most direct investments you can make in your career.
Integrate a SIEM for Blue Team Perspective
As highlighted in Virtual Cyber Labs’ comprehensive home lab guide, integrating SIEM tools like Splunk or ELK Stack for log management and analysis transforms your lab from a one-sided attack range into a full-spectrum training environment. Point your vulnerable VMs at your SIEM so you can watch your own attacks generate alerts in real time. Seeing your Metasploit exploit trigger a detection rule is one of the most valuable “aha” moments in the entire cybersecurity learning journey.
Add Network Segmentation with a Virtual Firewall
As the Core Lab 2026 Networking & Cybersecurity Roadmap explains, for most home lab users in 2026, OPNsense is the best overall choice for an open-source virtual firewall. Setting up VLANs in your lab, even just two or three dramatically shrinks your blast radius. A compromised VM in one network segment can’t freely communicate with VMs in another, giving you real defense-in-depth that mirrors genuine enterprise architecture.
Cloud Integration
Use AWS Free Tier which gives you 750 compute hours per month for a full year or a budget VPS to practice cloud attack scenarios and understand how exposure works in hybrid environments. This mirrors how real-world enterprise attack surfaces extend far beyond physical hardware into cloud infrastructure.
Document Everything in GitHub
Build a public GitHub repository documenting your lab setup, machine write-ups, network diagrams, and lessons learned from each exercise. With millions of cybersecurity positions unfilled globally, employers are increasingly prioritizing candidates who can demonstrate practical skills over those who can only cite certifications. That GitHub portfolio is your living proof of capability and as Cyberdesserts’ 2026 practice lab guide notes, a personal security lab bridges the gap between theoretical knowledge and job-ready skill in a way that nothing else can.
Step 10: Safety, Legal, and Ethical Rules for Your Cybersecurity Home Lab
This section is non-negotiable. Before you launch your first scan, make sure these rules are clear:
- Never scan, probe, or attack any system you don’t own or have explicit written permission to test – Unauthorized access is a criminal offense under the Computer Fraud and Abuse Act (CFAA) in the US, the Computer Misuse Act in the UK, and equivalent laws in virtually every other country.
- Keep your vulnerable VMs fully isolated from the public internet and your home network at all times – before, during, and after every exercise session.
- Take snapshots before anything destructive – This is your safety net and your ability to reset and repeat, which is how real skill gets built.
- Keep a lab journal – Document what you tried, what worked, what didn’t, and what you learned. This habit turns your lab into a professional portfolio asset over time.
- Never test your techniques on real infrastructure – not even infrastructure you think is abandoned or unmonitored. The lab is your legal playground. Keep everything inside it.
Understanding attack techniques in a controlled environment also makes real-world threat reporting feel far less abstract. The exploitation methods you’ll practice in your cybersecurity home lab are the same techniques behind the incidents covered in our breakdown of recent data breaches in 2026 and how to protect your personal data online. When you’ve run a Pass-the-Hash attack yourself, reading about one in a breach report suddenly makes complete sense.
Beginner vs Intermediate vs Advanced Cybersecurity Home Lab: At a Glance
| Lab Level | Hardware | Key Tools | Skills Practiced | Estimated Cost |
|---|---|---|---|---|
| Beginner | 16GB RAM, SSD | VirtualBox, Kali, Metasploitable 2 | Nmap, Basic Metasploit, Wireshark | $0 |
| Intermediate | 32GB RAM, 500GB SSD | + DVWA, Security Onion, Wazuh | Web app attacks, IDS/SIEM, Packet analysis | $0 – $200 |
| Advanced | 64GB RAM, 1TB NVMe | + Active Directory, OPNsense, ELK Stack | AD attacks, Firewall config, full SOC simulation | $200 – $500 |
| Expert | Dedicated server | + Cloud integration, Proxmox, Docker | Cloud security, Containerization, CI/CD pipeline testing | $500+ |
Conclusion: Your Cybersecurity Home Lab Is Your Competitive Advantage in 2026
There’s no shortcut to becoming a competent cybersecurity professional, but there is a smarter path. And that path runs directly through a well-built, consistently used cybersecurity home lab. In 2026, the barrier to entry has never been lower. The tools are free, the learning platforms are abundant, and the global demand for skilled practitioners is at an all-time high.
Start small, download VirtualBox today, get Kali Linux running, boot Metasploitable 2 and run your first Nmap scan. It won’t be perfect. Yes, you’ll break things. You’ll get confused. That’s not failure but exactly how learning happens in this field. Every error message is a lesson, and every broken VM is just a snapshot restore away from a fresh start.
The professionals landing six-figure salaries and genuinely exciting careers didn’t wait until they felt ready. They built their labs, documented their progress in GitHub repositories, and let the work speak for itself. Your bedroom, your laptop, and a few gigabytes of freely available software are all you need to start that same journey today. There has genuinely never been a better time or a cheaper one to begin.
CyberPrivacyLab Team is a cybersecurity-focused platform dedicated to helping individuals and businesses stay safe online.
Our expertise includes cybersecurity, ethical hacking, network defense, and privacy protection. We provide practical, research-backed insights designed to help users understand threats, secure their systems, and protect their digital identity.
Our content is informed by hands-on experience with industry-standard tools such as Kali Linux, Wireshark, Nmap, Security Onion and others, ensuring that our guides are both practical and relevant.
We are committed to delivering clear, accurate, and actionable cybersecurity knowledge to support safer digital experiences.